CHAPI for Digital Wallets
CHAPI integrates easily into digital wallet software, allowing your wallet to receive and present Verifiable Credentials to/from third party sites.
Web Wallets
- Wallet Registration
- Verifiable Credential Storage
- Verifiable Credential Presentation
- DID Authentication with CHAPI
Native Wallets
Resources
- Example Code: the chapi-demo-wallet contains a full example implementation and is referenced throughout this guide.
- Polyfill Library: The credential-handler-polyfill library provides the needed
CredentialHandlerAPI within the browser. - Helper Library: The web-credential-handler library provides helper functions for CHAPI integration in your code.
Web Wallet Registration
All Wallets need to be registered as a Credential Handler in the user's browser in order to store or retrieve Verifiable Credentials (VCs) from across the Web.
A Web Wallet is typically made up of three main parts:
- A main page for the wallet (e.g.,
/index.html) - Web App Manifest containing credential handler affordances (using
/manifest.json) - A routing endpoint for handling requests between CHAPI and the Wallet (e.g.,
/wallet-worker.html)
1. Add a credential_handler to your Web app's manifest.json
In order to register a credential handler, your Web app must serve a manifest.json file from its root path (/manifest.json). This file must be CORS-enabled which can be done by adding the Access-Control-Allow-Origin: * header to responses for that URL.
At a minimum, the manifest.json file should contain the following credential_handler object:
{
  "credential_handler": {
    "url": "/wallet-worker.html",
    "enabledTypes": ["VerifiablePresentation"]
  }
}
chapi-demo-wallet/manifest.json
The /wallet-worker.html page (note: you can use another name if you'd like)
will setup listeners for CHAPI-sent events which can then be handled by your
Wallet. More on that in a bit.
2. Import the CHAPI Polyfill into your wallet's main page
To register with CHAPI, your user must trigger the registration of your wallet as a Credential Handler within their browser. This must be initiated by user interaction, so you cannot automatically register without the user clicking a button.
We will load two libraries into the Wallet code to enable the registration:
- Polyfill Library: The credential-handler-polyfill library provides the needed
CredentialHandlerAPI within the browser. - Helper Library: The web-credential-handler library provides helper functions for CHAPI integration in your code.
You can add these libraries via <script> tags and watch a click event to
trigger the CHAPI registration and handler installation:
<button id="installHandlerButton">Register Wallet</button>

<script src="https://unpkg.com/credential-handler-polyfill@3/dist/credential-handler-polyfill.min.js"></script>
<script src="https://unpkg.com/web-credential-handler@2/dist/web-credential-handler.min.js"></script>

<script>
  document.getElementById('installHandlerButton').addEventListener('click', async function() {
    try {
      await credentialHandlerPolyfill.loadOnce();
      await WebCredentialHandler.installHandler();
      console.log('Handler Installed Successfully!');
    } catch (error) {
      console.error('Error installing handler: ' + error.message);
    }
  });
</script>Alternatively, if you're developing your Web Wallet using Node.js tooling and bundling your applications JavaScript, you can add the credential-handler-polyfill library to your project via NPM. The web-credential-handler helper library can also be added to simplify your code.
npm i credential-handler-polyfill@3
npm i web-credential-handler@2
In your code, you can import and load the polyfill library as follows:
import * as CredentialHandlerPolyfill from 'credential-handler-polyfill';
import * as WebCredentialHandler from 'web-credential-handler';
Once you've done that and bundled it, reference the output/bundled .js in
your index.html (note: you can use another name if you'd like).
3. Setup Listeners for CHAPI Events
Lastly, we need to setup event listeners in the /wallet-worker.html file that
was setup as the credential_handler.url in the manifest.json file.
That can be done by configuring your wallet to respond to Credential Handler events. The activateHandler() function is a helper that sets up listeners for CHAPI get() and store() events.
Add the following code (as well as the polyfill and helper library above) to
your /wallet-worker.html:
WebCredentialHandler.activateHandler({
    async get(event) {
        console.log('WCH: Received get() event:', event);
        return { type: 'redirect', url: '/wallet-ui-get.html' };
    },
    async store(event) {
        console.log('WCH: Received store() event:', event);
        return { type: 'redirect', url: '/wallet-ui-store.html' };
    }
})
chapi-demo-wallet/wallet-worker.html
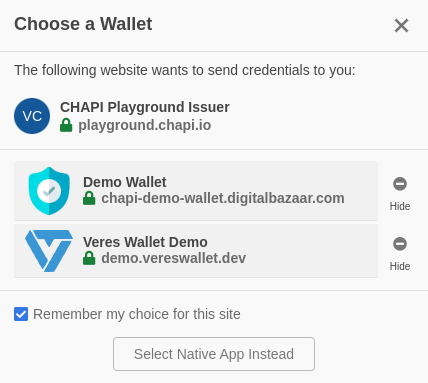
Now, with those things in place, you can test the process out on the
Playground. First, click the button in your
/index.html to register with CHAPI. Then, use either the Verifier or Issuer
sections of the Playground to trigger get() (Verifier) or store()
(Issuer) events when you select your Wallet in the CHAPI Wallet selector modal.
Verifiable Credential Storage
Wallets are able to store Verifiable Credentials issued by third-party websites using CHAPI.
Store Credentials Events
CHAPI supports storing credentials via the navigator.credentials.store() API. If you've configured an event listener, you can follow the example below to call the relevant code in your wallet whenever it receives a CHAPI store() request from a third-party website.
async function handleStoreEvent() {
    const event = await WebCredentialHandler.receiveCredentialEvent();
    console.log('Store Credential Event:', event.type, event);

    // Your wallet's code for storing a Verifiable Credentials
}
chapi-demo-wallet/wallet-ui-store.html
Storage of credentials prompts the individual using the browser to confirm that they want to store the credential in their digital wallet.
Verifiable Credential Presentation
Wallets are able to present Verifiable Credentials to third-party websites using CHAPI.
Get Credentials Events
CHAPI supports the presentation of credentials via the navigator.credentials.get() API. CHAPI is agnostic to the presentation request query language and passes the query directly through to the credential handler. If you've configured an event listener, you can follow the example below to call the relevant code in your wallet whenever it receives a CHAPI get() request from a third-party website.
  async function handleGetEvent() {
    const event = await WebCredentialHandler.receiveCredentialEvent();

    console.log('Wallet processing get() event:', event);

    //Your wallet's code for responding to a request for a Verifiable Credential
  }
chapi-demo-wallet/wallet-ui-get.html
When credentials are requested, wallets should show the user what will be shared and require the user's explicit consent before the credentials are presented to the requesting party.
DID Authentication with CHAPI
This section is written from the perspective of web wallets. CHAPI provides a simple method for a 3rd party website to request an individual present their Decentralized Identifier (DID) and prove their identity. The individual selects a digital wallet to respond to this DID Authentication request.
Resources
1. The 3rd Party Site sends a DID Authentication Request
The individual interacts with a 3rd party website, triggering a request for DID Authentication. The site sends a Verifiable Presentation Request (VPR) using the CHAPI get() event.
An example VPR is shown below. Like the other CHAPI examples on this site, the VPR is wrapped in a web credential object - this ensures that it is passed to a Credential Handler in the individual's browser.
"web": {
  "VerifiablePresentation": {
      "query": {
        "type": "DIDAuthentication"
      },
      "challenge": "IME0WNG2MIOsYsPgezxAM", //randomly-generated challenge string (e.g.,a UUID, nanoid, or bnid)
      "domain": "https://vcplayground.org" //URL of your web app (where the wallet will respond to the DID Auth request
  },
  "recommendedHandlerOrigins": [
      "https://demo.vereswallet.dev/"
  ]
}
2. The Digital Wallet responds with a Verifiable Presentation
The individual selects a digital wallet, which responds to the CHAPI get() event. The example code below shows two functions, plus a third function that your wallet will need to create
handleGetEvent()responds to the CHAPIget()event and callsformDIDAuthResponse()if it sees a request for DID Authentication.formDIDAuthResponse()creates a "web" credential containing a signed Verifiable Presentation meeting the VPR Spec for DID AuthenticationsignDidAuthPresentation()is the lower-level function in your wallet that creates a signed Verifiable Presentation with the user's DID.
async function formDidAuthResponse({challenge, domain}) {
    const dataType = 'VerifiablePresentation';

    //Add your code for signing a verifiable presentation
    didAuthPresentation = await signDidAuthPresentation({challenge, domain});

    //wrap the DID Auth presentation in a web credential
    const credentialType = 'VerifiablePresentation';
    const didAuthResponse = new WebCredential(
      credentialType, didAuthPresentation, {
      recommendedHandlerOrigins: []
    });

    return didAuthResponse;
}

async function handleGetEvent() {
    const event = await WebCredentialHandler.receiveCredentialEvent();
    console.log('Get Credential Event:', event.type, event);

    const vp = event.credentialRequestOptions.web.VerifiablePresentation;
    const query = Array.isArray(vp.query) ? vp.query[0] : vp.query;

    const {type} = query.value;
    if(type ==='DIDAuthentication') {
      event.respondWith(formDidAuthResponse({challenge: vp.challenge, domain: vp.domain}))
    }
}
Your wallet's version of signDidAuthPresentation() should create a signed Verifiable Presentation with the holder equal to the user's DID. The example below shows what this looks like with the Ed25519Signature2020 and 2018 signature suites, respectively.
const didAuthPresentation = {
    '@context': [
        'https://www.w3.org/2018/credentials/v1',
        'https://w3id.org/security/suites/ed25519-2020/v1'
    ],
    type: ['VerifiablePresentation'],
    holder: 'did:key:z6MkeprvBw4RFHJPQEmtioq4xRrN6Tk8EBSJ37eBCBQNHRjZ',
    proof: {
        type: 'Ed25519Signature2020',
        created: '2022-11-09T22:04:18Z',
        verificationMethod: 'did:key:z6MkeprvBw4RFHJPQEmtioq4xRrN6Tk8EBSJ37eBCBQNHRjZ#z6MkeprvBw4RFHJPQEmtioq4xRrN6Tk8EBSJ37eBCBQNHRjZ',
        proofPurpose: 'authentication',
        challenge: 'qd4_rg4FvyYDUIuy-DmN9',
        domain: 'https://localhost:51443',
        proofValue: 'zinUxNo4eLvMRU7QaYwSKTKRkvYud7cDeh3B8zm3G1FLZGiSKjCXFgZiQTLKJmpLuatgpcqCTpRZBj4ETAsddcfe'
    }
};
const didAuthPresentation = {
    "@context": [
        "https://www.w3.org/2018/credentials/v1",
    ],
    "type": "VerifiablePresentation",
    "holder": "did:v1:test:nym:z6MkjsQSCqdN4CGE6R9tKhETAEoPYdXci5v4tK2USAhWptpr",
    "proof": {
        "type": "Ed25519Signature2018",
        "created": "2022-10-28T20:24:27Z",
        "verificationMethod": "did:v1:test:nym:z6MkjsQSCqdN4CGE6R9tKhETAEoPYdXci5v4tK2USAhWptpr#z6MkjsQSCqdN4CGE6R9tKhETAEoPYdXci5v4tK2USAhWptpr",
        "proofPurpose": "authentication",
        "challenge": "IME0WNG2MIOsYsPgezxAM",
        "domain": "https://vcplayground.org",
        "jws": "eyJhbGciOiJFZERTQSIsImI2NCI6ZmFsc2UsImNyaXQiOlsiYjY0Il19..n7f3DZ4yNuH2ApE0dZy1gaLBTKEuGYHGsmycgWwKptZaNeKz2FKRAjzPeat3GQnJg1n_5Q6GU9bAql602m2tCg"
    }
};